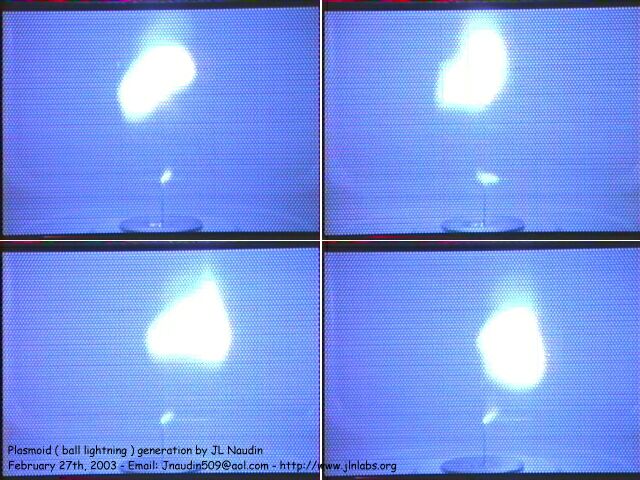
Plasmoid ( ball
lightning ) generation with a microwave resonator by Jean-Louis
Naudin Cliquez
ici pour la version Française created on
February 27, 2003 - JLN Labs -
Last update February 27, 2003 Toutes les informations et schémas sont publiés
gratuitement ( freeware ) et sont destinés à un usage personnel
et non commercial All informations and
diagrams are published freely (freeware) and are intended for a private use and a non commercial
use.
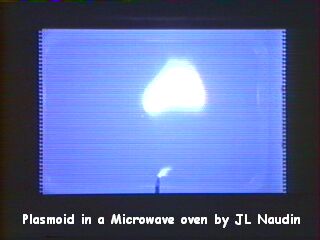
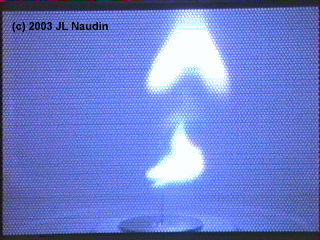
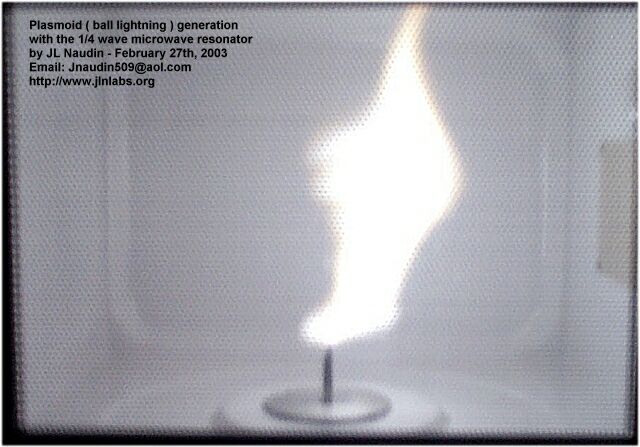
The purpose of this test is to build a plasmoid ( a
ball lightning ) with a microwave resonator placed in a microwave
oven. A microwave oven uses a magnetron as microwave source, its
working frequency is 2.45 GHz. A magnetron is compact, has a
light weight ( compared to a HV transformer with the same output
power ) and it is a high power device. It is able to produce a
great amount of power in a small volume most particularly in a
plasmoid. A plasmoid is a great
source of ions and can be very useful for EHD, MHD and
Electrokinetic devices such as the Lifter....
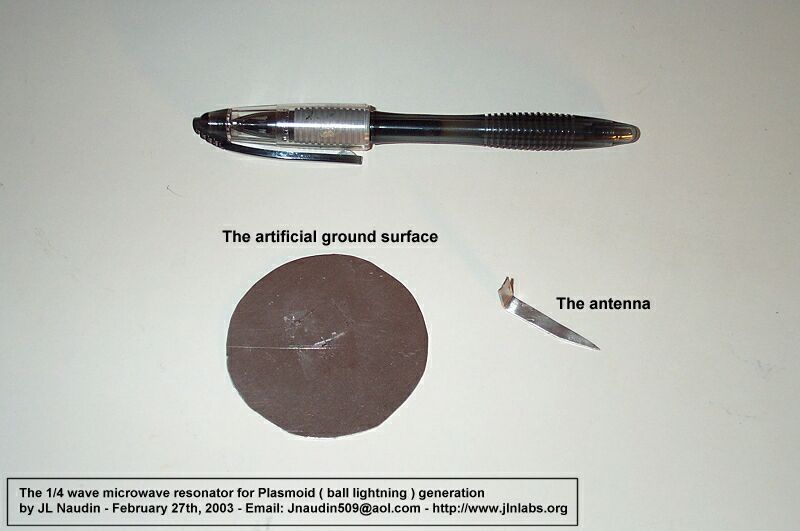
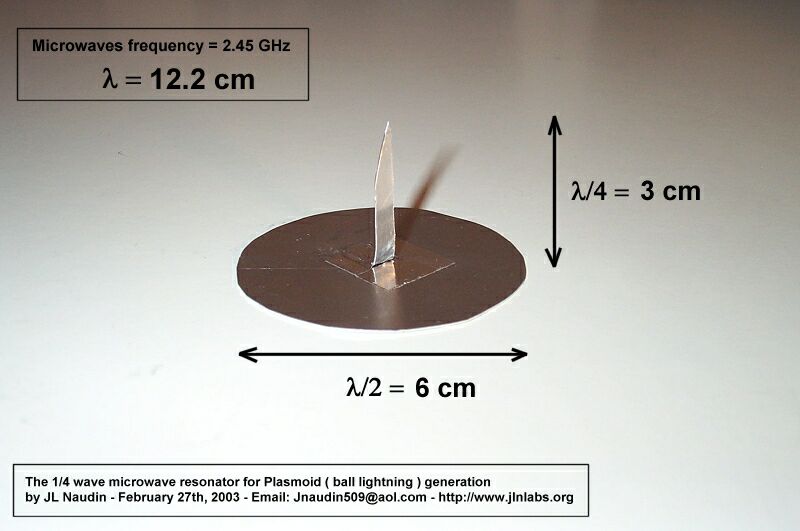
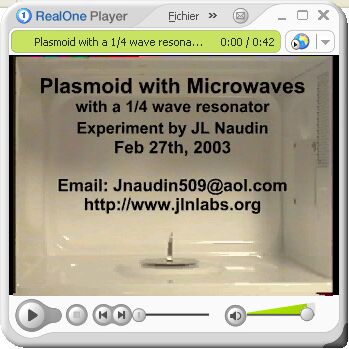
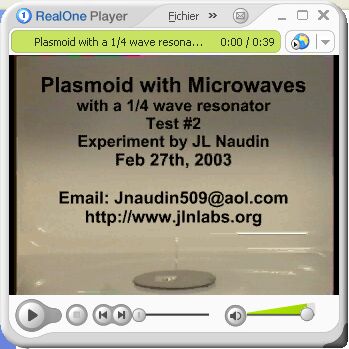
This experiment uses a microwave resonator composed
with a small quater wave antenna mounted on an artificial ground
surface. The frequency of the magnetron is 2.45 GHz, its wave
length is l = 12.2 cm, this
givesthe height of the 1/4 wave microwave antenna : l/4
= 3 cm and the ground base
diameter : l/2 = 6 cm.
You will find below a very simple experiment that
anyone can perform with a simple kitchen microwave oven.
Materiel requirement
:
A microwave oven which is
able to produce about 700 Watts of microwave power,
A small piece of aluminum
sheet, 5/10 mm thick and about 10x10 cm,
A piece of adhesive
aluminum or a cyanoacrylate glue tube,
A small glass of water.
Microwave resonator
construction :
1) Cut a 60 mm diameter disk in
the aluminum sheet,
2) Cut a small rectangle 5x40 mm in the aluminum sheet,
3) To make the antenna, shape to a point one side of this
rectangle, then bend at right angle the other side so as the
antenna height is 30 mm ( see the photo below ).
4) Fit together the
two pieces of aluminum with a piece of adhesive aluminum or
cyanoacrylate glue as shown in the photo below.
Your microwave
resonator is finished and now, your plasmoid generation
experiment is ready to begin...
Warning : Don't
forget that the Plasmoid generates ozone (O3) and
nitrogen oxydes ( NO and NO2), so you need to do this
experiment in an open and well ventiled area.
If you do it the risk of any results is
just yours. I take no responsibility of anything that
might happen.
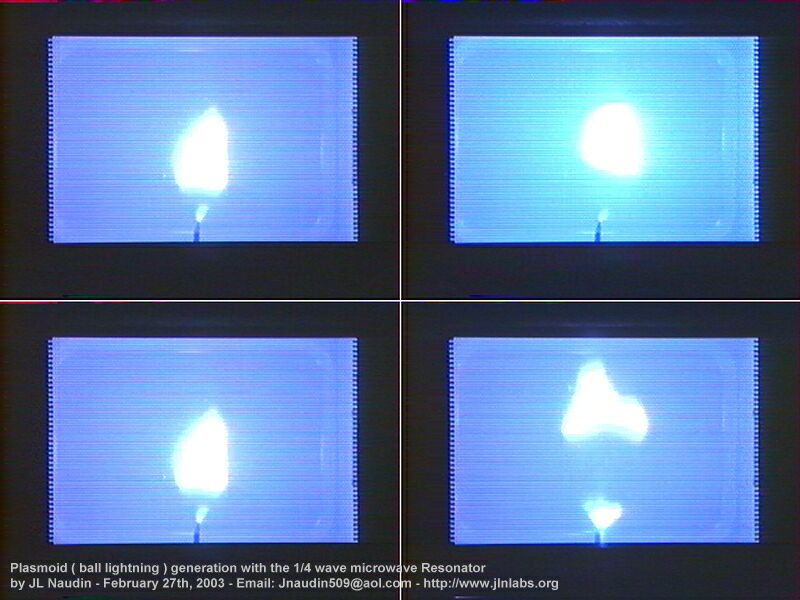
Plasmoid
launching sequence
:
Open the windows so as to get a
well ventiled area.
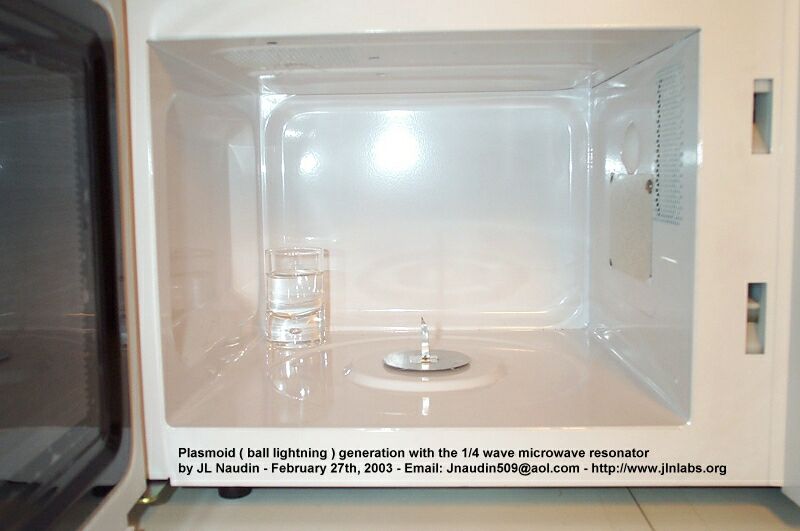
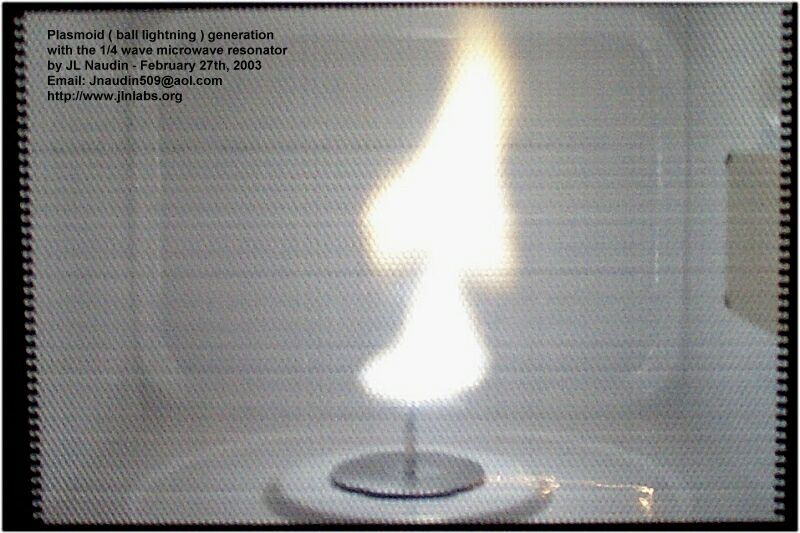
Put your
microwave resonator in the middle of the microwave oven.
Put a small
glass of water ( optional ) as shown in the photo above.
The glass of water is used to protect the magnetron, it
will avoid that an eventual excess of power overheat its
anode. In the photo above, you may notice that the
rotating plate and its axis has been removed, this can be
done easily.
Close the
microwave door.
Set the
microwave power to max power.
Set the
countdown timer to 10 seconds.
Push the ON
Button... Then....Watch and hear the plasmoid in
action...
It is recommended
to wait some minutes between each test. This will avoid that the
magnetron overheat too much. Notes
: If the plasmoid
is not generated few seconds after the switch on, don't wait and
stop the microwave oven. Put a plastic box ( 30 mm height ) under
the aluminum disk. So, the quater wave antenna will be placed at l/4
= 3 cm above the ground
surface of your microwave oven, you will notice that the plasmoid
will start quickly...